Breaded Pork Chops
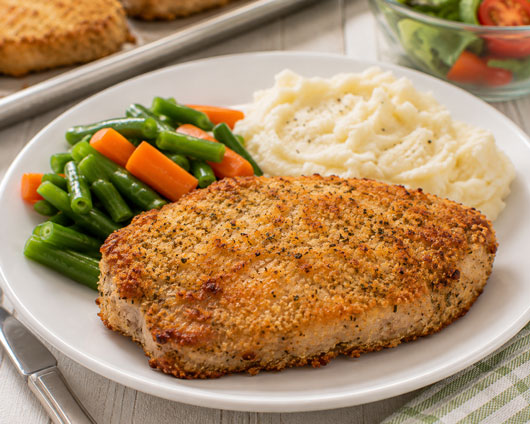
These oven-baked pork chops are another great way to practice the coating and breading technique. This recipe uses three layers - seasoned flour, milk or buttermilk, and bread crumbs - to create a crisp coating without frying.
Prep Time: 15 minutes
Cook Time: 20-30 minutes
Yield: 4-6 servings
Ingredients
- 4-6 boneless pork loin chops
- 1/2 cup all-purpose flour
- 1/2 teaspoon seasoned salt
- 1/4 cup milk, plain yogurt, or buttermilk
- 1/2 cup Italian-style dry bread crumbs
- Cooking spray
Directions
- Preheat the oven to 375F. Lightly coat a casserole dish or baking sheet with cooking spray.
- If the pork chops are very thick, have an adult carefully slice them into thinner pieces so they cook more evenly.
- Set three shallow dishes or pie plates next to each other to make a breading station.
- In the first dish, stir together the flour and seasoned salt. Pour the milk, yogurt, or buttermilk into the second dish. Add the bread crumbs to the third dish.
- Step 1 - Flour: Place each pork chop in the seasoned flour and turn it over to lightly coat both sides. Shake off any excess flour.
- Step 2 - Wet coating: Dip the floured pork chop into the milk or buttermilk, coating both sides.
- Step 3 - Bread crumbs: Transfer the pork chop to the bread crumbs. Turn and gently press the crumbs onto both sides until evenly coated.
- Place the breaded pork chops in the prepared baking dish. Repeat with the remaining pork chops.
- Lightly spray the tops with cooking spray. This helps the bread crumbs become golden and crisp in the oven.
- Bake for about 20-30 minutes, depending on the thickness of the pork chops, until cooked through. Pork should reach a safe internal temperature of 145F, followed by a 3-minute rest.
Why Use Three Coatings?
The flour gives the wet coating something to cling to. The milk or buttermilk then helps the bread crumbs stick to the pork. Layering the coatings in this order creates a more even breading that is less likely to fall off during cooking.
Make Ahead Tip
You can bread the pork chops ahead of time, cover them, and refrigerate until you are ready to bake dinner. Keep raw pork refrigerated and separate from ready-to-eat foods.
Recipe, image, and content from
Kids-Cooking-Activities.com