

Chocolate Transfers
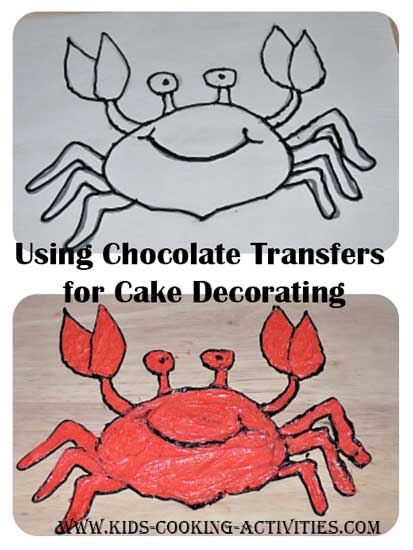
These images are done much like a buttercream transfer but instead of using buttercream frosting you use melted chocolate.
The chocolate image is then frozen or chilled and added to a frosted cake. We'll show you how to do it.
How to Make Images for Cake Decorating
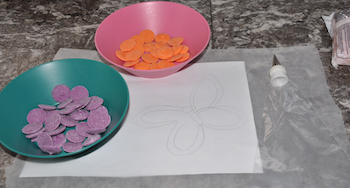
You will need to use candy
melts for this project. They come in a variety of colors that
work great for these projects.Find a picture, image or use a cake
decorating pattern, you'd like to create a chocolate image.
Melt candy melts in the colors you'd like to decorate with. Spoon
melted chocolate in a disposable
pastry bag with a writing tip. Work quickly so your
chocolate doesn't harden!
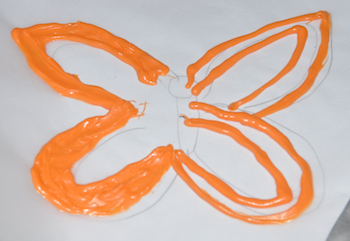
Fill in your design with the colors you wish. You can smooth the chocolate with a clean paintbrush, knife or your finger.
Place in the freezer for 30 minutes or if you'd like to prep ahead you can place your frozen images in ziploc bags.
To make your transfer stronger you can frost a layer of candy melts over the top of your frozen image. Place in the freezer again. Once you lay your image down on your cake the candy melt layer will be on the bottom and your image on top.
The chocolate transfer image will actually
be laid down on top of the cake. So any images you do will be a
mirror image. So if you do wording of any kind try printing off a
reverse image in Microsoft Word or other publication.
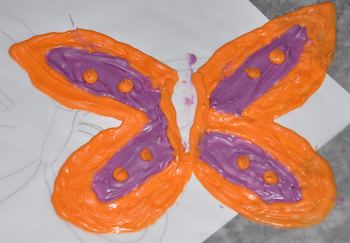
Butterfly Cupcake with Chocolate Image
Here is an example of what you can do with a butterfly chocolate image.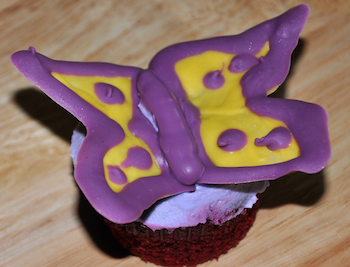
It is a good idea to make extra images in
case one breaks.
You can use this same technique with buttercream icing instead of
melted chocolate, when making a buttercream
transfer.Printable Chocolate Trivia Worksheet
Add Accents
You can also use a simple version of this by making random designs for chocolate accents.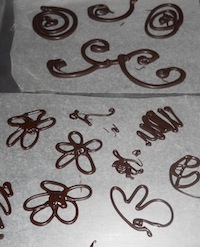
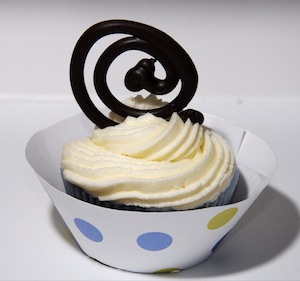
Another Candy Melt Transfer Example
Instead of using a disposable pastry bag you can use a paintbrush to paint the outline of your image. Then add details with black candy melts or pipe black frosting.
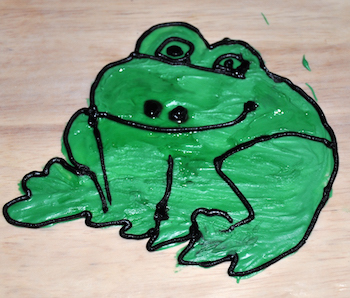
Place in freezer several hours. When ready to add to your cake, place image on top of frosted cake. Peel waxed paper off carefully. Then add any details you'd like to your cake.
Related Cake Decorating Pages:
~10 Fun Ideas, ~Recipes, ~Piping Techniques, ~Jar Cakes, ~Cake Party, ~Decorating Borders, ~Decorating Techniques, ~Color Batter, ~Buttercream Transfer, ~Fondant Decorating, ~Fondant Recipes, ~Decorating Patterns, ~Chocolate Transfers, ~Cookie Cake, ~Cookie Decorating, ~Color Flow Decorating, ~Cake Pops, ~Push Pops, ~Fun Cupcake Ideas, ~Wrappers, ~Cupcake Bouquet, ~Cupcake Cakes, ~Tree Stand, ~How to make cupcakes, ~Frost Cupcakes, ~Giant cupcake, ~Cone Cakes, ~Heart Cupcakes, ~Cream Filled, ~Supplies
Get Free Kids Recipe Cards + Cooking Printables
Join Kids Cooking Activities for fun recipes, cooking ideas, and printable resources for kids, families, and classrooms.
Follow Kids Cooking Activities too:


© Debbie Madson, Madson Web Publishing, LLC — All rights reserved.
The material on this site is for educational purposes only.