

Frozen Buttercream Transfer for Cakes
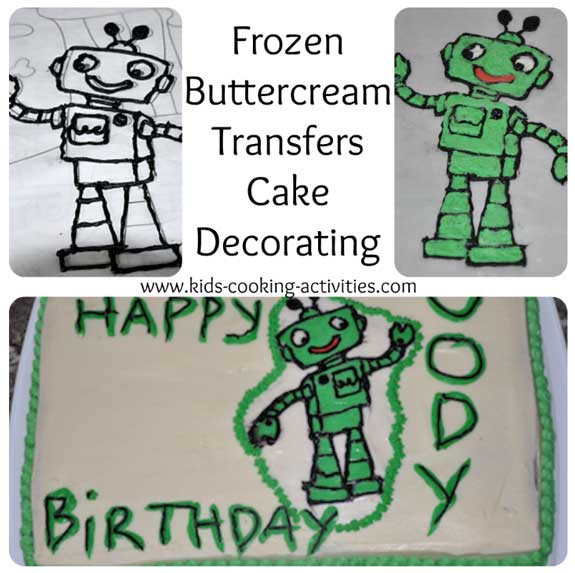
A frozen buttercream transfer is a cake decorating design made by piping frosting onto wax paper, freezing it, and then placing the frozen design onto a frosted cake. It is a helpful technique for kids and beginners because the picture can be traced from a printed pattern instead of drawn freehand on the cake.
This page is part of the Kids Cake Decorating Ideas section and connects with cake decorating patterns, buttercream frosting techniques, and creative kitchen activities.
Kids Cooking Activities Teaching Materials
Teaching kids to cook? Save time with ready-made lesson plans used by parents and teachers. Browse teaching materials →


This page may contain affiliate links. We may earn a small commission at no extra cost to you. Learn more.
On This Page
- What Is a Frozen Buttercream Transfer?
- Supplies Needed
- How to Make a Buttercream Transfer
- Freeze and Strengthen the Transfer
- Place the Transfer on a Cake
- Important Mirror Image Tip
- Frozen Buttercream Transfer Video
- Use Buttercream Transfers On
- More Cake Decorating Ideas
- Frozen Buttercream Transfer FAQ
What Is a Frozen Buttercream Transfer?
A frozen buttercream transfer is a picture made from buttercream frosting. Instead of drawing the design directly onto a cake, you trace a pattern on wax paper, fill it in with frosting colors, freeze it until firm, and then place it on the cake.
This method is useful for character cakes, simple picture cakes, holiday cakes, and birthday cakes because it lets kids and beginners work on the design while it is flat on the table.
Supplies Needed
- A printed picture, coloring page, or cake decorating pattern
- Wax paper or parchment paper
- Tape
- A sheet pan or flat tray
- Buttercream frosting in several colors
- Black frosting or another outline color
- Decorating bags
- Writing tips or small round tips
- A clean food-safe paintbrush, small spatula, or butter knife for smoothing
- A frosted cake ready for the finished transfer
How to Make a Buttercream Transfer
1. Choose and Tape Down the Pattern
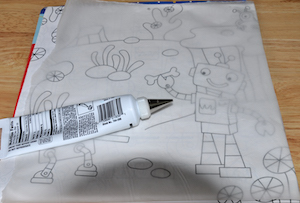
Find a picture, coloring page, or cake decorating pattern you would like to use. Tape the picture to your work surface so it does not slide around.
2. Cover the Pattern With Wax Paper
Place a sheet of wax paper or parchment paper over the image. Tape the wax paper down too, so both layers stay flat while you trace.
3. Outline the Design
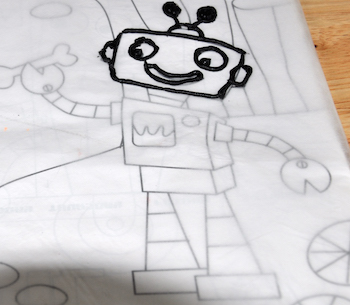
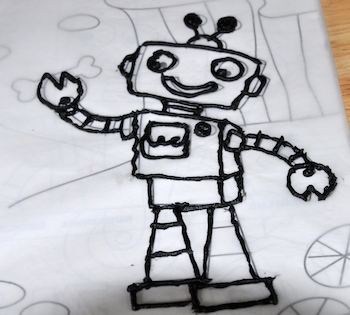
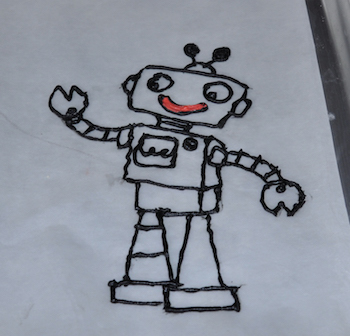
Use black frosting or another outline color in a decorating bag with a small round tip. Trace the outside lines of the design first. This outline helps keep the colored frosting sections separated.
4. Move the Transfer to a Sheet Pan
Once the outline is finished, carefully move the wax paper to a sheet pan or flat tray. This makes it easier to place the buttercream transfer in the freezer without bending it.
5. Fill In the Colors
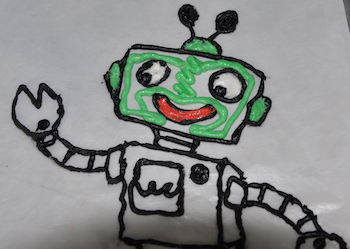
Fill in each section with colored frosting. Use a writing tip for small areas. Smooth the frosting with a clean food-safe paintbrush, small spatula, clean finger, or butter knife. Try to fill in all spaces so there are no gaps in the design.
Freeze and Strengthen the Transfer
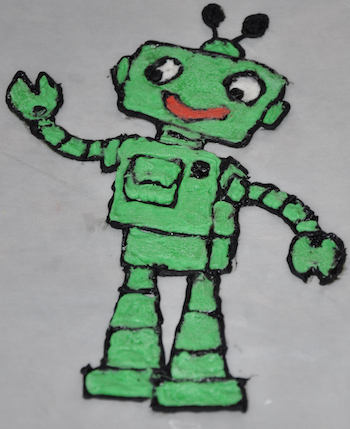
Place the buttercream transfer in the freezer for several hours or overnight. The design needs to be frozen solid before you peel it away from the wax paper.
To make the transfer stronger, add a layer of white frosting or another backing color over the back of the frozen image. Place the transfer in the freezer again. When the design is placed on the cake, the backing frosting will be underneath and the image will show on top.
This cake decorating method is good for planning ahead. Once the transfer is frozen solid, you can store it flat in a freezer bag until you are ready to decorate the cake.
Place the Transfer on a Cake
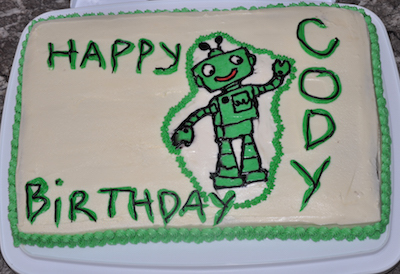
When you are ready to decorate, frost your cake first. Take the frozen image out of the freezer, peel it from the wax paper, and immediately lay it on the frosted cake.
After the transfer is on the cake, pipe around the edges or add any finishing details you would like.
Important Mirror Image Tip
The image will be flipped when you place it on the cake. If your design includes words, letters, numbers, or direction-specific details, print the image in reverse before tracing it. That way, the finished buttercream transfer will face the correct direction on the cake.
Frozen Buttercream Transfer Video Tutorial
Use Buttercream Transfers On
Frozen buttercream transfers are useful when kids want a picture design on a cake but need a pattern to follow. They work best for simple shapes, cartoon-style pictures, holiday designs, and large clear outlines.
Good Buttercream Transfer Practice Projects
- Birthday cakes
- Cupcakes
- Cookie cakes
- Kids cooking party cakes
- Holiday cakes
- Food art projects
- Creative kitchen activity projects
- Simple cooking lesson projects
More Cake Decorating Ideas
Try these related cake decorating pages next to practice patterns, transfers, frosting designs, and beginner piping skills.
Try a Chocolate Version
You can also do this technique with chocolate transfers using melted chocolate or candy melts instead of buttercream frosting.
Frozen Buttercream Transfer FAQ
What is a frozen buttercream transfer?
A frozen buttercream transfer is a frosting design piped onto wax paper, frozen until firm, and then placed onto a frosted cake.
Can kids make a frozen buttercream transfer?
Yes. Kids can help trace, pipe, fill, and decorate a frozen buttercream transfer with adult supervision, especially when using small tips, freezer trays, and food coloring.
How long does a buttercream transfer need to freeze?
A buttercream transfer should freeze for several hours or overnight so it is firm enough to peel from the wax paper and place on the cake.
Do I need to reverse the image for a buttercream transfer?
Yes, if the design includes words or direction-specific details. The transfer is flipped onto the cake, so lettering should be printed as a mirror image before tracing.
More Cake & Cupcake Decorating Ideas
Cake Decorating
Cake & Cupcake Recipes
10 Decorating Ideas
Piping Techniques
Buttercream Techniques
Cake Borders
Color Cake Batter
Filling Layers
Buttercream Transfer
Decorating Patterns
Chocolate Transfers
Fondant Decorating
Fondant Recipes
Cake Projects & Parties
Jar Cakes
Cake Decorating Party
Cookie Cake
Cake Pops
Cone Cakes
Cupcake Ideas
How to Make Cupcakes
Frost Cupcakes
Fun Cupcake Ideas
Cupcake Cakes
Giant Cupcake Cake
Cupcake Push Pops
Cupcake Bouquet
Cupcake Recipes
Heart Cupcakes
Cream Filled Cupcakes
Cupcake Printables & Supplies
Cupcake Wrappers
Cupcake Tree Stand
Cupcake Supplies
Cookie Decorating
Cookie Decorating
Color Flow Decorating
Get Free Kids Recipe Cards + Cooking Printables
Join Kids Cooking Activities for fun recipes, cooking ideas, and printable resources for kids, families, and classrooms.
Follow Kids Cooking Activities too:





© Debbie Madson, Madson Web Publishing, LLC — All rights reserved.
The material on this site is for educational purposes only.