

How to Make Homemade Chocolates (Easy for Kids!)
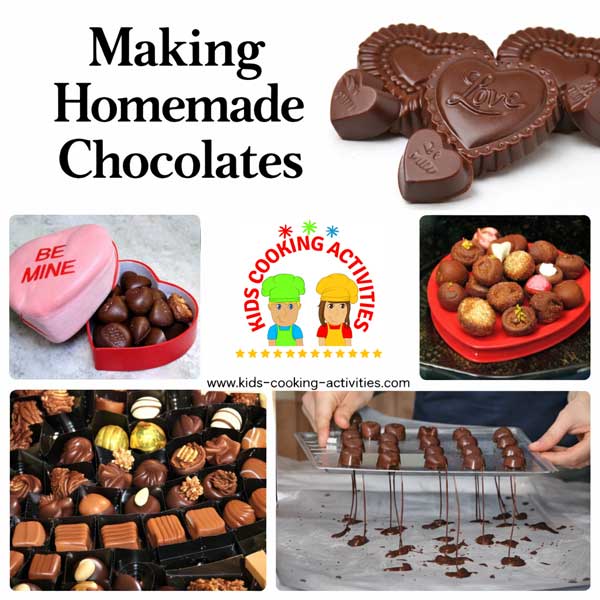
Making homemade chocolates is much easier than you might think, and it's a perfect cooking activity to enjoy with kids. With just candy molds and melting chocolate, you can create beautifully shaped chocolates for any holiday or special occasion. Kids love choosing the shapes and helping fill the molds and you'll love how simple the process is!
You can find candy molds in craft stores, cake decorating shops, or even large retail chains. They come in endless designs - holiday themes, hearts and stars, animals, bite-size shapes, and more and they're inexpensive enough that it's worth keeping a few on hand year-round. Once you get started, you'll find yourself making chocolates for birthdays, Christmas, Valentine's Day, Easter, and party favors too.
Kids Cooking Activities Teaching Materials
Teaching kids to cook? Save time with ready-made lesson plans used by parents and teachers. Browse teaching materials →
This post may contain affiliate links. We may earn a small commission at no extra cost to you. Learn more.
Jump to these Chocolate Tutorials:
- Homemade chocolate basics
- Step by Step Candy Mold Chocolates
- Using leftover chocolate
- How to fill your chocolates
- Chocolate filling recipes
- Dipped chocolates
- Dipped Oreos
- How chocolate is made
- Chocolate suckers
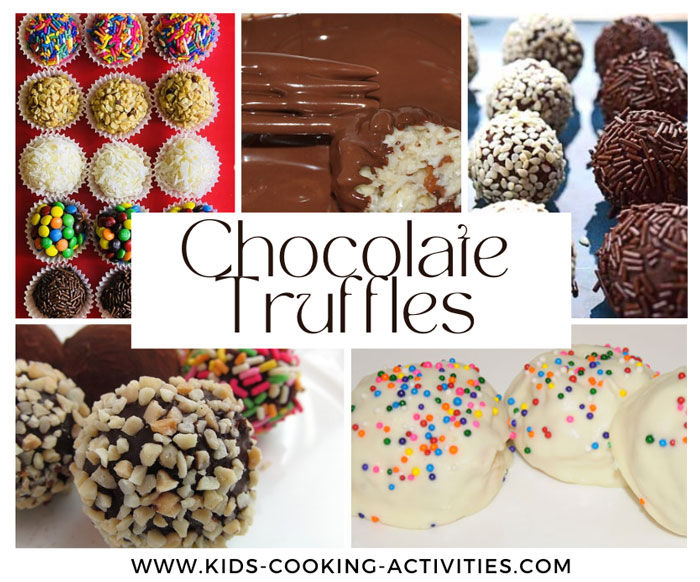
- Chocolate truffles
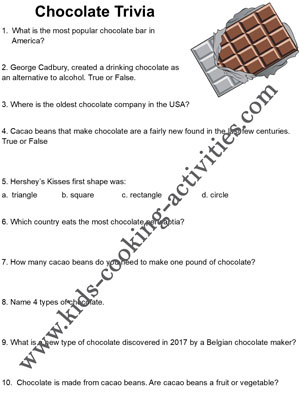
- Chocolate trivia
Homemade Chocolate Basics
Besides candy molds, the key to making chocolates that hold their shape is candy melts (also called melting wafers). These melt smoothly and firm up properly in molds.Tip: Avoid using regular chocolate chips - while delicious, they stay too soft and won't release cleanly from molds.
Once your chocolates are made, you can store them in the freezer or fridge. They look beautiful on a Christmas candy platter alongside other holiday treats and they make wonderful homemade gifts for neighbors, friends, and teachers. You can also create these as gifts to give away for Valentine's Day or Easter too.

Candy Mold Chocolates: Step-by-Step
You will need:- Candy molds
- Wilton candy melts or melting chocolate wafers of your choice, whatever flavors and colors you choose
- Waxed paper and a cookie sheet
- Spoon or small ladle
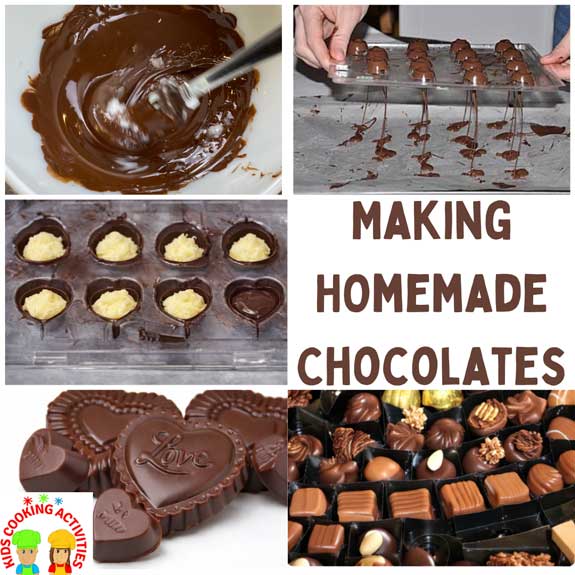
- Melt the chocolate- Place candy melts in a microwave-safe bowl and heat for 30-second intervals, stirring between each, until smooth.
- Fill the molds - Spoon melted chocolate into each mold, filling to the top. Wipe the edges clean with your finger or a paper towel so the finished chocolates have neat edges.
- Remove air bubbles - Gently tap the mold on the counter to release air pockets.
- Chill - Place molds in the freezer for about 10 minutes, or until the underside looks frosty and firm.
- Unmold - Turn the mold upside down over waxed paper. The chocolates should pop out easily - flex or tap the mold gently if needed.
What to Do With Leftover Chocolate
Pour remaining melted chocolate onto waxed paper on a cookie sheet, spread it into a thin layer, and let it firm up. Break it into chunks and store in a resealable bag- you can remelt it later or enjoy as chocolate bark! Now you know how to make homemade chocolates using candy molds, you can take it a step further by adding fillings or nuts inside.Printable Chocolate Trivia Worksheet
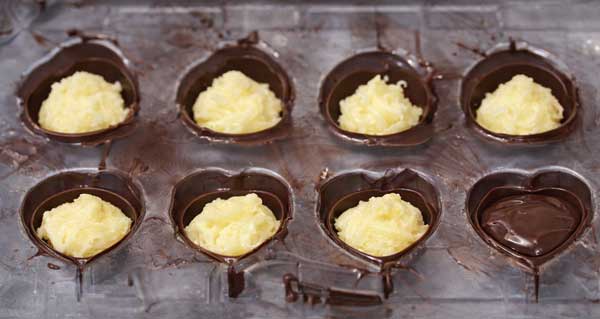
How to Fill Your Chocolates-Adding Fillings (Optional but Extra Delicious!)
Once you've mastered basic chocolates, try adding fillings or nuts for a tasty surprise inside.To fill chocolates:
- Melt chocolate as before.
- Spoon a small amount into each mold, filling halfway.
- Turn the mold upside down over waxed paper and let excess drip out, leaving a thin chocolate shell.
- Wipe edges clean and freeze 5-10 minutes.
- Add fillings such as almonds, hazelnuts, peanut butter, caramel, or one of our homemade filling recipes below.
- Spoon melted chocolate over the top to fill molds completely.
- Wipe edges again and freeze until firm.
- Pop chocolates out and enjoy!
How to Make Homemade Chocolate Fillings
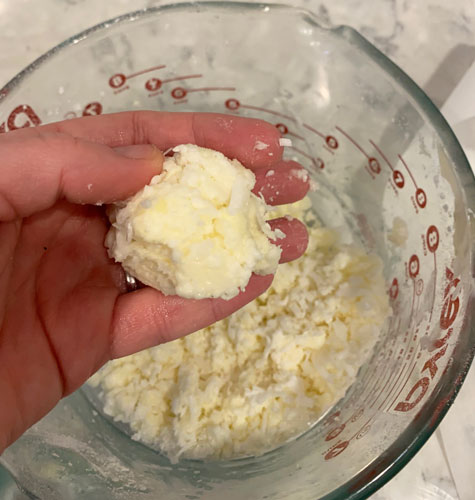
Use these fillings by placing a small spoonful or rolled ball of filling into each molded chocolate shell- just remember to leave space for chocolate on top to seal it.Peanut Butter Filling for Candy Molds
Ingredients:- 3/4 Cup peanut butter
- 3/4 Cup powdered sugar
- 1 Tablespoon melted butter
Peppermint Patty Filling
Ingredients:- 4 Tablespoons butter, soft
- 2 1/2 Cups powdered sugar
- 1 teaspoon peppermint extract
- 1/4- 1/2 Cup light corn syrup
Chocolate Covered Cherries
Ingredients:- 2 1/2 Cups powdered sugar
- 2 teaspoons vanilla
- 1/3 Cup heavy cream
- 1 bottle maraschino cherries
Cream Filling
You can buy dry fondant in cake decorating shops. This is how you get chocolates with cream fillings. Use whatever flavoring you like such as peppermint, strawberry, lemon, etc. Little bottles of flavoring for candy is also sold in cake shops.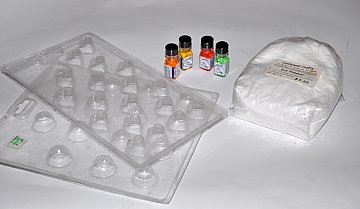
Melt 8 Tablespoons butter, mix with 3 Tablespoons cream and 1 lb. dry fondant. Flavor with a few drops of flavoring and add a little drop of color. Use filling in candy molds or dipped chocolates.
How to Make Homemade Chocolates -Dipped
Dipping chocolates is another fun and delicious way to use melted candy chocolate. Once you've mastered the melting process, you can dip all kinds of fillings and treats to create your own assortment of chocolate-covered goodies. Kids especially enjoy rolling filling into balls, dipping fruit, or decorating pretzels for the holidays. Dipped chocolates also make wonderful gifts and party treats because you can customize the flavors, toppings, and shapes for any occasion.Prepare your fillings or dipping items first so everything is ready before the chocolate begins to cool. Melt your candy melts as instructed above. If you're using a soft filling, scoop about a tablespoon at a time and roll it into small balls before dipping. Use a fork or dipping tool to coat each piece in melted chocolate, allowing the excess to drip off. Place dipped items on a waxed paper-lined baking sheet until firm. To speed up the hardening process, simply chill them in the fridge or freezer.

Below are some ideas to help you get started dipping:
- Strawberries or other fresh fruit (bananas, cherries, apple slices)
- Pretzels, pretzel rods, or pretzel twists
- Crackers such as Ritz or graham crackers
- Homemade fillings rolled into balls (peanut butter, coconut, caramel, mint cream)
- Marshmallows or marshmallow pops
- Dried fruit such as apricots or pineapple rings
- Cookies (Oreos, vanilla wafers, shortbread)
- Toasted nuts or clusters of mixed nuts
- Rice Krispie treats cut into bite-size pieces
- Check out these chocolate truffle recipes
Dipped Oreos
Melt your chocolate and prepare a cookie sheet with a sheet of waxed paper.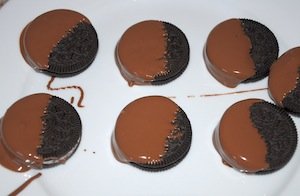
Sprinkle with additional sprinkles or mini M&M's if desired. Let set until hardened.

More Chocolate Making Activities
Would you like to learn how chocolate is made?Now learn how to make chocolate suckers.

Make Chocolate Truffles
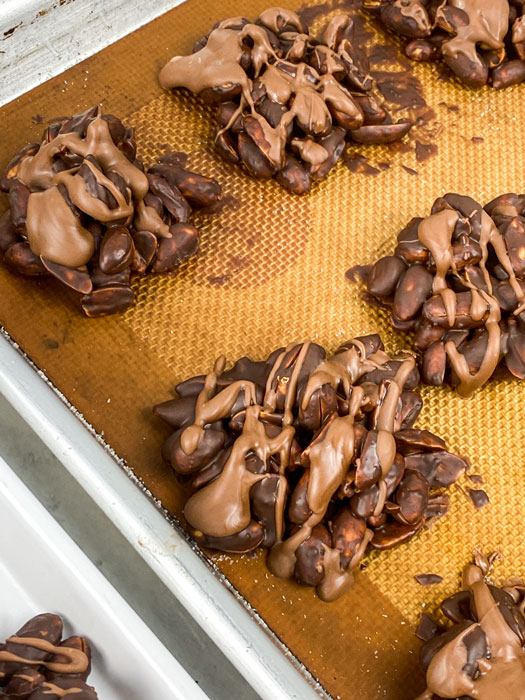
Chocolate Peanut Clusters
Related Seasonal Recipe Pages:
~School Lunches, ~ Apples, ~ Autumn Activities, ~ Pumpkins, ~Kids Halloween Recipes, ~ Halloween Recipe Ideas, ~ Thanksgiving, ~Hanukkah Recipes, ~Kids Christmas cooking, ~Christmas Candy Recipes, ~ Reindeer, ~ Make Homemade Chocolates, ~Jar Mixes, ~Gift Basket Ideas, ~Homemade Fudge Recipes, ~ Homemade Suckers, ~ Christmas Cookie Recipes, ~ Gingerbread House Recipes, ~ Food Gift Ideas, ~ Dough Ornament Recipes, ~Hot Cocoa, ~ Happy New Year, ~ Snowman Theme Recipes, ~ Valentine's Day, ~ Valentine Dessert Recipes, ~ St. Patrick's Day, ~ April Fool's Day Recipes, ~Passover Recipes, ~Kids Easter Recipes, ~ Sugar Eggs Recipe, ~ Resurrection Cookies Recipe, ~Italian Easter Bread, ~ Russian Easter Bread Recipe, ~Earth Day, ~ Cinco de Mayo, May 5, ~ Mother's Day Recipes, ~ Father's Day Recipes, ~Summer Cooking, ~ Kid's Campfire Cooking Recipes, ~Dutch Oven Cooking for Kids, ~ 4th of July Recipes, ~ Ice Cream Recipes, ~ Popsicle Recipes, ~ Simple Smoothie Recipes, ~ Picnic Ideas and Recipes, ~ Easy Grilling Recipes, ~Grow your own Garden
Submit your favorite kids recipe
Do you have a favorite recipe your kids love to make? Or a recipe your kids ask you to make again and again? Share it with us!
Reader's Submitted Recipes
Click below to see contributions from other visitors to this page...
Chocolate Peanut Clusters
Prep time: 15 minutes (+ 40 minutes to chill)
Cook time: 20-25 minutes
Yield: Approximately 20 large peanut clusters
Ingredients: 3 c. raw, blanched …
Get Free Kids Recipe Cards + Cooking Printables
Join Kids Cooking Activities for fun recipes, cooking ideas, and printable resources for kids, families, and classrooms.
Follow Kids Cooking Activities too:


© Debbie Madson, Madson Web Publishing, LLC — All rights reserved.
The material on this site is for educational purposes only.